Tutorial
Learn how to set up Veins.
Below, we give a brief tutorial-style introduction on how to get started with installing and using Veins. For other tutorial-style introductions on how to use Veins as well as more in-depth information, please refer to the publications page.
The easy way
For quickly trying out Veins and for running Veins on systems you do not have administrative access to, we are recommending Instant Veins, a virtual machine that contains a ready-to-run version of Veins and all supporting tools.
About Instant VeinsIf you are using Instant Veins, you can directly skip ahead to the final step: running Veins.
For learning how to set up Veins on your own machine, read on.
The hard way
Note: Veins runs on Linux, Mac OS X, and Windows. Because of the extensive debugging capabilities that it offers, Veins is best built and run on Linux. For running Linux on Windows, we recommend using the Windows Subsystem for Linux (WSL) or a virtual machine running Linux. This will allow the use of additional libraries (such as for INET, 5G, or LEO satellites) and result in a much smoother experience than running Veins natively on Windows.
This tutorial assumes that you are using Windows 11, that your home directory is C:\Users\user, and that all necessary software will be installed in C:\Users\user\src (which was already created).
Aside from the paths given and the opening of the OMNeT++ MinGW command line window vs. a regular command line window, these steps are similar when building and running the simulations on Linux or Mac OS X.
Step 1: Download SUMO
![]() Download a zip file of the SUMO 1.22.0 binaries and unpack them as
Download a zip file of the SUMO 1.22.0 binaries and unpack them as C:\Users\user\src\sumo-1.22.0. This should give you an executable C:\Users\user\src\sumo-1.22.0\bin\sumo.exe.
If you want to (or have to) build SUMO manually, detailed instructions for many platforms can be found on the Installation Instructions on the SUMO website.
Note:
Make sure you are running the right version of SUMO for your Veins installation. If you are unsure which version of SUMO you are running, the output of sumo --version will tell you. You can get a quick overview of supported SUMO versions from the Veins Changelog.
Step 2: Download and build OMNeT++ 6
![]() Download OMNeT++ 6.1 for Windows and unpack it as
Download OMNeT++ 6.1 for Windows and unpack it as C:\Users\user\src\omnetpp-6.1.
Note: If you unpack OMNeT++ to a different folder, make sure it contains no spaces.
This should give you a script
C:\Users\user\src\omnetpp-6.1\mingwenv.cmd
that you can run to open a MinGW command line window, which closely mimics a Linux environment. On other operating systems, the OMNeT++ install guide has many helpful hints on pre- and post-configuration of your system.
Build OMNeT++ 6 by running
./configure
(making sure to examine the summary for potential errors) followed by
make
to start the build process. If all went well, this will result in /c/Users/user/src/omnetpp-6.1/bin/omnetpp being built. Run
omnetpp
to launch the OMNeT++ 6 IDE. This tutorial will assume that you picked C:\Users\user\src\omnetpp-6.1\samples as your workspace.
Step 3: Download and build the Veins module framework
![]() Download Veins 5.3.1 and unpack it as
Download Veins 5.3.1 and unpack it as C:\Users\user\src\veins-5.3.1. Import the project into your OMNeT++ IDE workspace by clicking File > Import > General: Existing Projects into Workspace and selecting the directory you unpacked the module framework to.
Build the newly imported project by choosing Project > Build All in the OMNeT++ 5 IDE. After the project built, you are ready to run your first IVC evaluations, but to ease debugging, the next step will ensure that SUMO works as it should.
Step 4: Make sure SUMO is working
In the OMNeT++ MinGW command line window, you should be able to have SUMO simulate an example scenario by changing the current directory to /c/Users/user/src/veins-5.3.1/examples/veins/ using cd ../veins-5.3.1/examples/veins and running
/c/Users/user/src/sumo-1.22.0/bin/sumo.exe -c erlangen.sumo.cfg
to start SUMO. You should see a line saying "Loading configuration... done.", then - after a short while - with no further output be returned to the command line.
Note:
If you used a different path to install SUMO, remember which command you ran instead of /c/Users/user/src/sumo-1.22.0/bin/sumo.exe.
You will need to supply this command to the -c option of veins_launchd in the next step.
To get an impression of what the example scenario looks like, you can also run it using sumo-gui.exe, but this is not required for Veins to work.
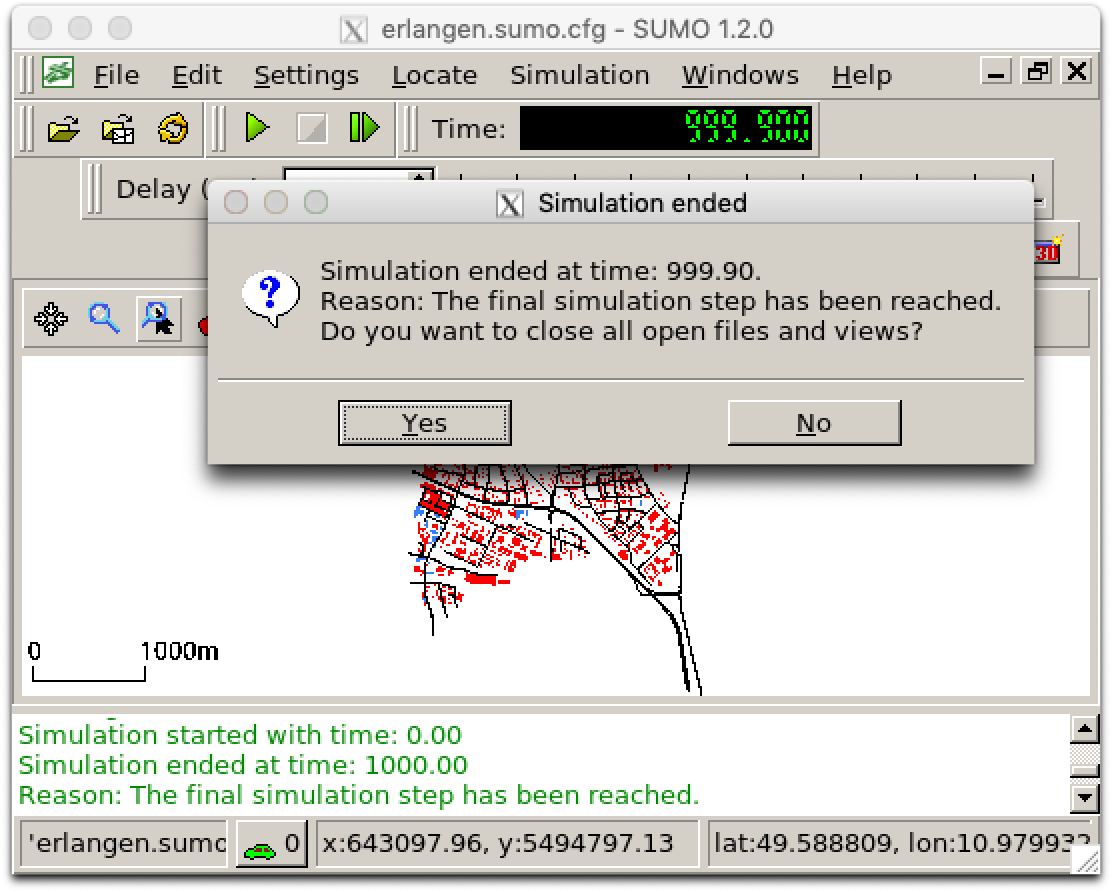
Example scenario running in the SUMO GUI.
Final step: Run the Veins demo scenario
To save you the trouble of manually running SUMO prior to every OMNeT++ simulation, the Veins module framework comes with a small python script to do that for you. In the OMNeT++ MinGW command line window, start it by running
/c/Users/user/src/veins-5.3.1/bin/veins_launchd -vv -c /c/Users/user/src/sumo-1.22.0/bin/sumo.exe
Note:
If you used a different path to install SUMO, remember which command you ran instead of /c/Users/user/src/sumo-1.22.0/bin/sumo.exe in the last step.
You will need to supply this command to the -c option of veins_launchd.
This script will proxy TCP connections between OMNeT++ and SUMO, starting a new copy of the SUMO simulation for every OMNeT++ simulation connecting. The script will will print Listening on port 9999 and wait for the simulation to start. Leave this window open and switch back to the OMNeT++ 5 IDE.
Hint:
If you don't want to enter the full path to your sumo binary every time you start the launchd, you can also add it to the PATH variable of your mingw environment. To do so, create a file /c/Users/user/src/omnetpp-6.1/.profile and add
export PATH=$PATH:/c/Users/user/src/sumo-1.22.0/bin
In the OMNeT++ 5 IDE, simulate the Veins demo scenario by right-clicking on veins-5.3.1/examples/veins/omnetpp.ini and choosing Run As > OMNeT++ simulation. Don't forget to allow access to SUMO through any personal firewall you might run. Similar to the last example, this should create and start a launch configuration. You can later re-launch this configuration by clicking the green Run button in the OMNeT++ 5 IDE.
If everything worked as intended this will give you a working simulation scenario using OMNeT++ and SUMO running in parallel to simulate a stream of vehicles that gets interrupted by an accident.
If you ran a debug build of the simulation (e.g., by choosing Debug as instead of Run as when launching the simulation by right-clicking on omnetpp.ini and acknowledging the prompt to build the simulation to debug mode), you will see a wealth of debug output in the log window.
Note, however, that a simulation running in debug mode executes at lower speed.
If you are interested in seeing the source code of the application running on the simulated vehicles, check the omnetpp.ini option applType(click here to view the Veins 5.3.1 version online) and you will see it is TraCIDemo11p.
Its source code is contained in the file src/veins/modules/application/traci/TraCIDemo11p.cc (click here to view the Veins 5.3.1 version online).
You can see the handlePositionUpdate method, which defines how a vehicle reacts when a position update is received from SUMO: by checking whether it has been standing still for too long and, if it is, sending a broadcast to notify other vehicles about a possible jam on its current road.
You can also see the initialize method, which sets (among other things) sentMessage = false for this vehicle when the application starts.
The onWSM method of the application defines how it reacts to received data: by calling changeRoute to avoid the road it has received information about -- and (if sentMessage is still false) by scheduling a reminder to re-send this message in a little bit over 2 seconds and setting the sentMessage flag.
The handleSelfMsg method defines how it reacts to such reminders: by actually calling sendDown to send the broadcast.
See below for a GUI screencast of the example simulation: information dissemination via flooding while buildings block transmissions.
New Projects
While we recommend simply modifying the tutorial simulation to get started with using Veins, pretty soon you might want to create a dedicated OMNeT++ project.
To create this project, we recommend using cookiecutter-veins-project, which is a Cookiecutter template.
Open a command line window, install Cookiecutter according to its manual, then execute cookiecutter gh:veins/cookiecutter-veins-project. This will download the Cookiecutter template and ask you some questions, e.g., the project name and which additional module libraries you want the project to use (for which you can safetly select the default answer by pressing the Enter key).
It will then download the current version of Veins and create a new OMNeT++ project that is using Veins.
Batch execution
If you are planning to run a lot of Veins simulations on a lot of machines, you might be interested in projects runmaker and singularity-veins.
Project singularity-veins
Many of the largest High Performance Computing (HPC) centers are already offering Singularity support, but the software is also straightforward to download and install on a personal machine. You can then simply execute a command like...
singularity run -H .:/work -C --net --network none library://veins/singularity-veins/singularity-veins-0.0.4:d10-v5.0-o5.5.1-s1.3.1 --launchd --chdir src/veins -- ./configure
...to configure (similarly: to build and to run) a Veins simulation in a lightweight high performance container.
This container already has OMNeT++ and SUMO installed (check the tag of the container to see which versions) and can take care of keeping a dedicated, isolated instance of veins_launchd running while the simulation executes.
More information is available in the singularity-veins documentation.
For use on a personal machine, you might also be interested in docker-veins, a similar solution for Docker.
Project runmaker
After you downloaded and installed runmaker, you can simply create a text file, e.g. runs.txt that contains a list of commands to execute (prefixed by a dot and a space, see its documentation).
. ./run -r 1
. ./run -r 2
. ./run -r 3
Given a shared filesystem or networked machines, you can then simply run an arbitrary number of runmaker instances, e.g. as runmaker4.py -j2 runs.txt, which will take care of picking and executing jobs from this list on each of the machines they are being run on.
More information is available in the runmaker documentation.
End
This concludes the mini-tutorial. In-depth information on how to use Veins is available in the documentation, with answers to the most common questions in the list of Frequently Asked Questions (FAQ).